
My dad's side of the family came to Canada from Hungary, and like many families, some of our fondest memories were the incredible meals we had together. Food plays such an important part in who we are, and I was fortunate to have a grandmother who cooked and baked traditional Hungarian foods for us.
When I was in my late teens, maybe early twenties, my grandmother showed me how to make the dough for her almas kifli, which translated means apple crescent pastries. I watched her work, and took notes on a little index card. Years later, I found the card, and decided to give it try as a surprise for my father. Problem was, my grandmother didn't measure a thing...the card simply read: flour, fat, salt, water. Yikes! Over the past couple of years, I've reworked variations of her ingredients and technique, and finally hit the jackpot last week. The dough is as close as I can get to her recipe, and that makes me happy.
 Hungarian pastry is robust and filling, nothing delicate or dainty here, so don't be afraid to roll it out thick when making your pastries. Use this dough for jams, apple, poppy seed, or walnut fillings...recipes to follow. As for veganizing the recipe, little does anyone know that I have never used butter - I always bake with Earth Balance, a vegan margarine. Use the blocks, not the spreadable kind (2 blocks = 1/2 lb).
 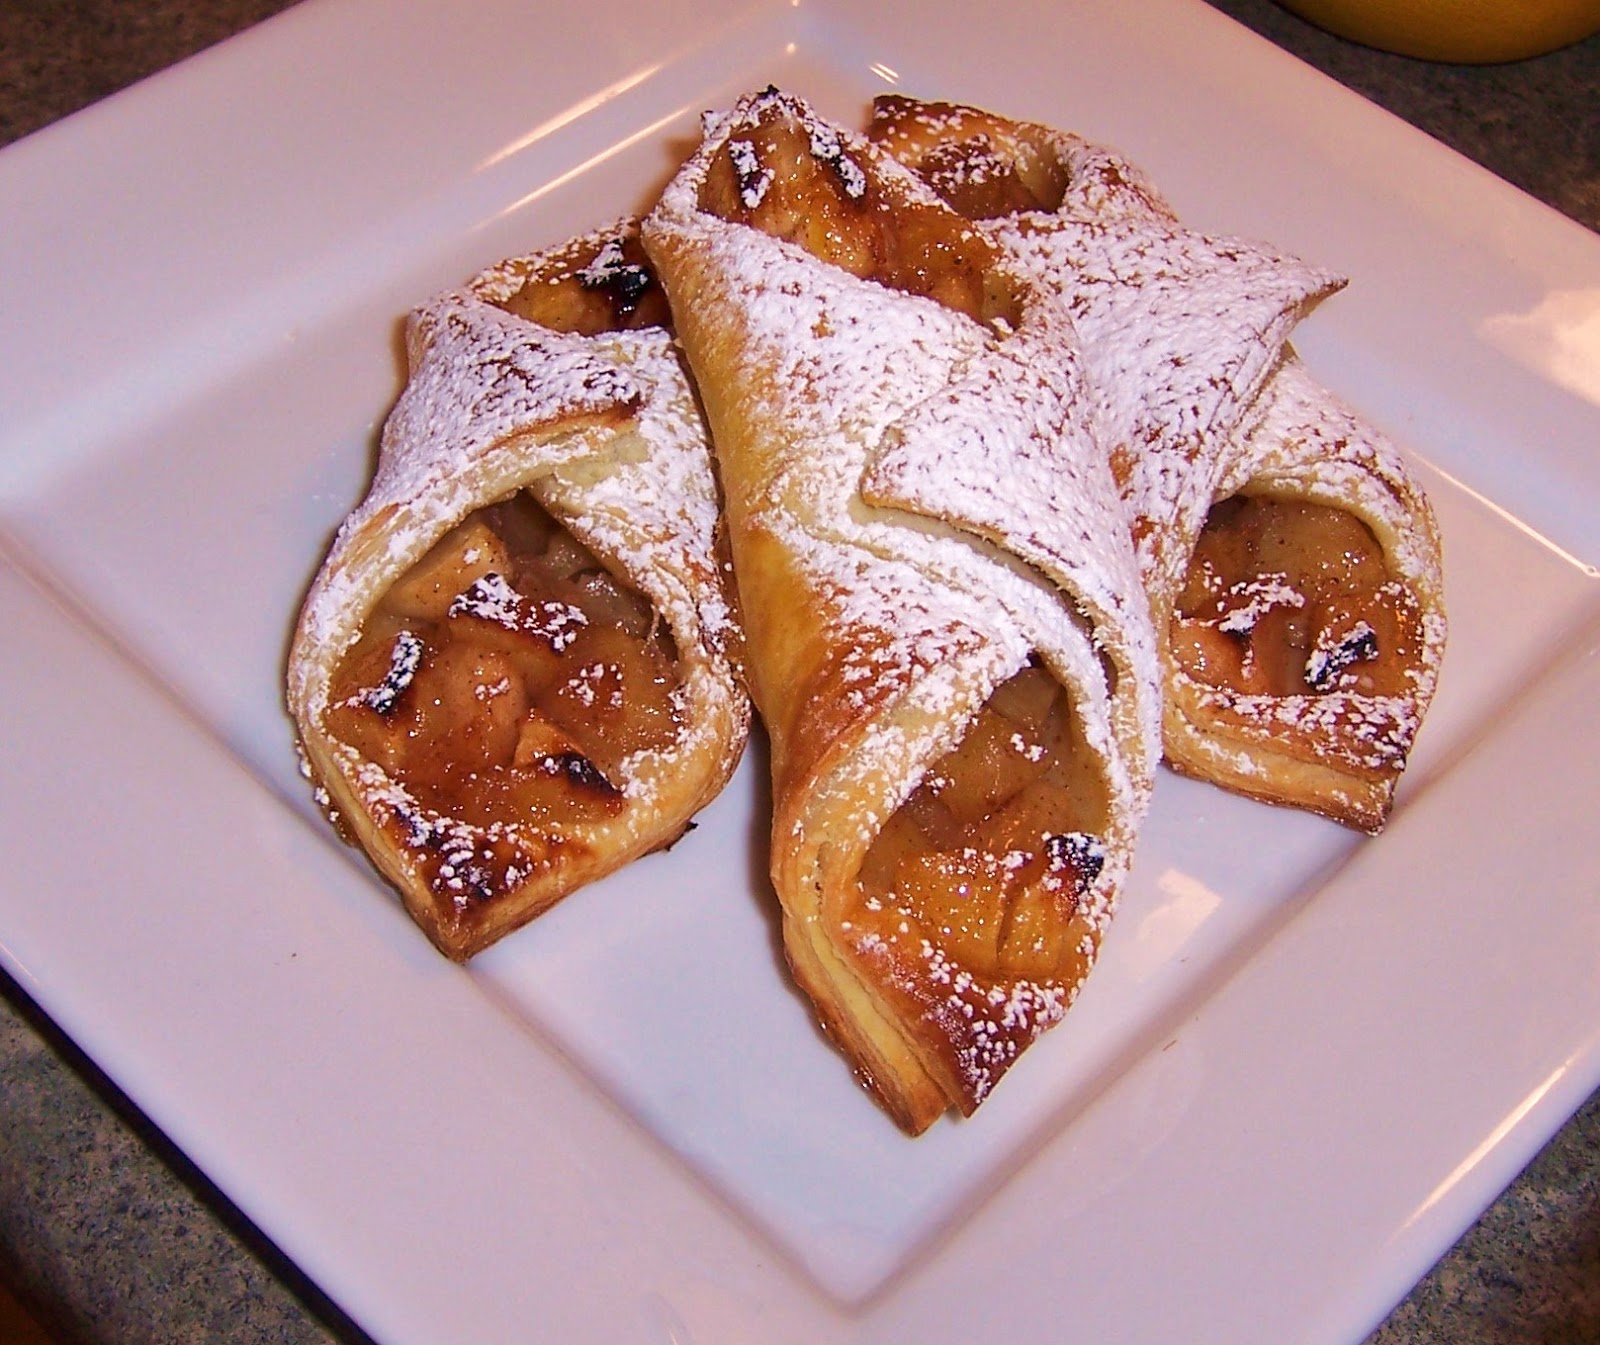 Plan ahead, this recipe takes at least a day or two, lots of time is needed to chill the dough. Not sure if it's worth it? Here's a sneak peak at what the final product looks like in full almas (apple) action.
Recipe to follow... :-)
Makes 12-20 pastries, depending on type. I strongly suggest you double the recipe!
1/2 lb butter, softened 1/2 lb vegan margarine, softened
4 cups flour 4 cups flour
1/4 tsp salt 1/4 tsp salt
1 Tbsp vinegar 1 Tbsp vinegar
2 egg yolks 1/4 cup vegan margarine, softened
ice cold water as needed ice cold water as needed

Start by mixing your 1/2 lb butter/margarine with 1/2 cup of the flour, I use a hand mixer to make things go a little more quickly. Next, cut 3 pieces of parchment paper, and spread out your mixture into 3 thin layers, approximately 3-4 mm thick. Put on a baking tray in fridge for an hour or two to chill.
When you've put your butter away to chill, start making your dough. The only difference between the traditional and vegan recipes is that the 2 egg yolks are substituted by an additional 1/4 cup vegan margarine, which you should work into the flour with a fork or pastry cutter before mixing with the other ingredients. I actually used a bread mixer for this part, but my grandmother used a good old-fashioned wooden spoon. Mix the remaining ingredients until a smooth elastic dough forms, adding more flour or ice water as needed. Cover with plastic wrap and leave in fridge for 4-5 hours, overnight if possible.
Now you're going to work the butter/margarine layers into your dough. Roll up your sleeves, you're going to need to put some muscle in it! Remove 1 butter block from the fridge, let it soften just a little while you roll out your dough. The dough should be rolled out to about 3-4 mm thick, or at least 3 times the size of your butter block. Use a lightly floured surface to roll the dough out, you want to add as little additional flour into the dough as possible.
 Lay the butter in the center of the dough, and fold over edges as pictured. Roll out dough again to three times the size of a butter block, and repeat the folding and rolling again with remaining butter blocks.
  Flour your dough and surface lightly, only as needed.
My grandmother used to refrigerate the dough for an hour or two in between rolling in the butter blocks,

but I find if you're sort on time it still
works well if the butter is chilled and you simply roll in all three pieces in the same go.
Wrap in plastic wrap and let refrigerate for 4-5 hours, or overnight. Do not skip this step! The difference in using the dough right away versus letting it chill thoroughly is incredibly...sure, your pastries still look nice and taste great, but chilling the dough greatly changes the appearance and flakiness of the layers. The last time I made these, I used only 1/2 of the dough right away, and made the second batch a couple of days later - the second batch was incredible, the dough has a hearty crispiness common to Hungarian pastries but still melted in your mouth. I had zero appetite at the time, but still managed to eat two.
I'll post some Hungarian filling recipes soon, but you could use this dough for almost anything. Another key step to beautiful results is to keep the dough chilled until the very minute you are ready to roll, fill and bake it! Preheat your oven, have your fillings ready.
In the traditional recipe, before baking brush the tops of the pastries with an egg that's been beaten first with a tablespoon of water. For the veganized version, brush with soy milk or leave plain, they'll still be delicious!
Bake pastries at 440-degrees for 10-15 minutes, until golden brown. Watch your pastry carefully, especially if your oven runs hot - you don't want these to burn. Dust liberally with powdered sugar, if desired. Store in a covered container.
Calorie count? Trust me, you don't want to know. This recipe actually uses less butter than my grandmother's, cause you know, I was trying to keep it light.